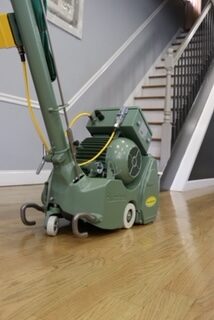
Installing Hardwood and Vinyl Flooring
Step-by-Step Installation Guide
Transform your space with our comprehensive guide on installing hardwood and vinyl flooring. Follow our expert tips for a flawless finish.
Installation Process
How to Install Your Flooring
1
Prepare Your Space
Clear the room of furniture and debris. Ensure the subfloor is clean, dry, and level.
2
Gather Your Tools
Collect all necessary tools and materials before starting the installation.
3
Install the Flooring
Follow the specific installation instructions for either hardwood or vinyl flooring, ensuring each piece is properly aligned and secured.
Essential Tools
- Measuring Tape
- Utility Knife
- Flooring Nailer
- Hammer
- Chalk Line
- Level
- Rubber Mallet
- Flooring Adhesive
- Spacers
- Pull Bar
- Moisture Barrier
- Safety Glasses
- Jigsaw
- Carpenter’s Square
- Floor Roller
- Notched Trowel
- Vacuum Cleaner
- Work Gloves

Preparation Tips for Flooring Installation
Before starting your flooring installation, it’s crucial to prepare your space properly. Begin by removing all furniture and existing flooring materials. Ensure the subfloor is clean, dry, and level. Gather all necessary tools, including a tape measure, utility knife, and adhesive. Acclimate your new flooring materials to the room’s temperature and humidity for at least 48 hours. This step helps prevent future warping or gaps. Finally, plan your layout by measuring the room and marking guidelines to ensure a precise installation.
Essential Tools for Installation
Having the right tools is essential for a smooth flooring installation. You’ll need a tape measure, chalk line, utility knife, hammer, nails, pry bar, adhesive, and a notched trowel. For hardwood flooring, a pneumatic flooring nailer can speed up the process. For vinyl flooring, a seam roller is useful for ensuring a firm bond. Don’t forget safety gear like gloves and knee pads to protect yourself during the installation.

Common Questions About Flooring Installation
We’ve compiled answers to some of the most frequently asked questions about installing hardwood and vinyl flooring.
How do I prepare my subfloor?
To prepare your subfloor, make sure it is clean, dry, and level. Remove any debris, old adhesives, and ensure there are no moisture issues. If necessary, use a leveling compound to smooth out any uneven areas.
Can I install new flooring over existing flooring?
In some cases, you can install new flooring over existing flooring, but it depends on the type and condition of the current floor. For example, vinyl flooring can often be installed over tile, but it’s best to remove old carpeting or damaged flooring before installing new hardwood.
How long should I acclimate my flooring materials?
It’s recommended to acclimate your flooring materials to the room’s temperature and humidity for at least 48 hours before installation. This helps prevent future issues like warping or gaps.
What type of adhesive should I use?
The type of adhesive you should use depends on the flooring material. For hardwood, a wood flooring adhesive is ideal, while vinyl flooring typically requires a vinyl adhesive. Always follow the manufacturer’s recommendations for the best results.
Do I need to leave a gap around the edges?
Yes, it’s important to leave an expansion gap around the edges of the room when installing hardwood or vinyl flooring. This allows the flooring to expand and contract with changes in temperature and humidity, preventing buckling or gaps.
Can I install flooring myself, or should I hire a professional?
Many DIY enthusiasts successfully install their own flooring. However, if you’re unsure or the project seems too complex, hiring a professional can ensure a high-quality installation. Consider your skill level, the type of flooring, and the scope of the project when making your decision.
What Our Customers Are Saying
“Using the DIY Blog’s guide, I was able to install my new hardwood floors with ease. The step-by-step instructions were clear and easy to follow. My living room looks fantastic!”
John Doe
Homeowner
“I was nervous about installing vinyl flooring in my kitchen, but the DIY Blog made it simple. The preparation tips were especially helpful, and the final result is stunning. Highly recommend!”
Jane Smith
DIY Enthusiast
“The DIY Blog’s comprehensive guide saved me a lot of time and money. I installed hardwood flooring in my bedroom, and it turned out beautifully. Thanks for the great advice and tips!”
Emily Johnson
First-time Installer
Ready to Transform Your Floors?
Embark on your flooring installation journey with confidence. Follow our expert tips and step-by-step guide to achieve professional results. Let’s make your dream floors a reality!